

R is the de facto statistical package in the Open Source world. It's also quickly becoming the default data-analysis tool in many scientific disciplines.
R's core design includes a central processing engine that runs your code, with a very simple interface to the outside world. This basic interface means it's been easy to build graphical interfaces that wrap the core portion of R, so lots of options exist that you can use as a GUI.
In this article, I look at one of the available GUIs: RStudio. RStudio is a commercial program, with a free community version, available for Linux, Mac OSX and Windows, so your data analysis work should port easily regardless of environment.
For Linux, you can install the main RStudio package from the download page. From here, you can download RPM files for Red Hat-based distributions or DEB files for Debian-based distributions, then use either rpm or dpkg to do the installation.
For example, in Debian-based distributions, use the following to install RStudio:
sudo dpkg -i rstudio-xenial-1.1.423-amd64.deb
It's important to note that RStudio is only the GUI interface. This means you need to install R itself as a separate step. Install the core parts of R with:
sudo apt-get install r-base
There's also a community repository of available packages, called CRAN, that can add huge amounts of functionality to R. You'll want to install at least some of them in order to have some common tools to use:
sudo apt-get install r-recommended
There are equivalent commands for RPM-based distributions too.
At this point, you should have a complete system to do some data analysis.
When you first start RStudio, you'll see a window that looks somewhat like Figure 1.
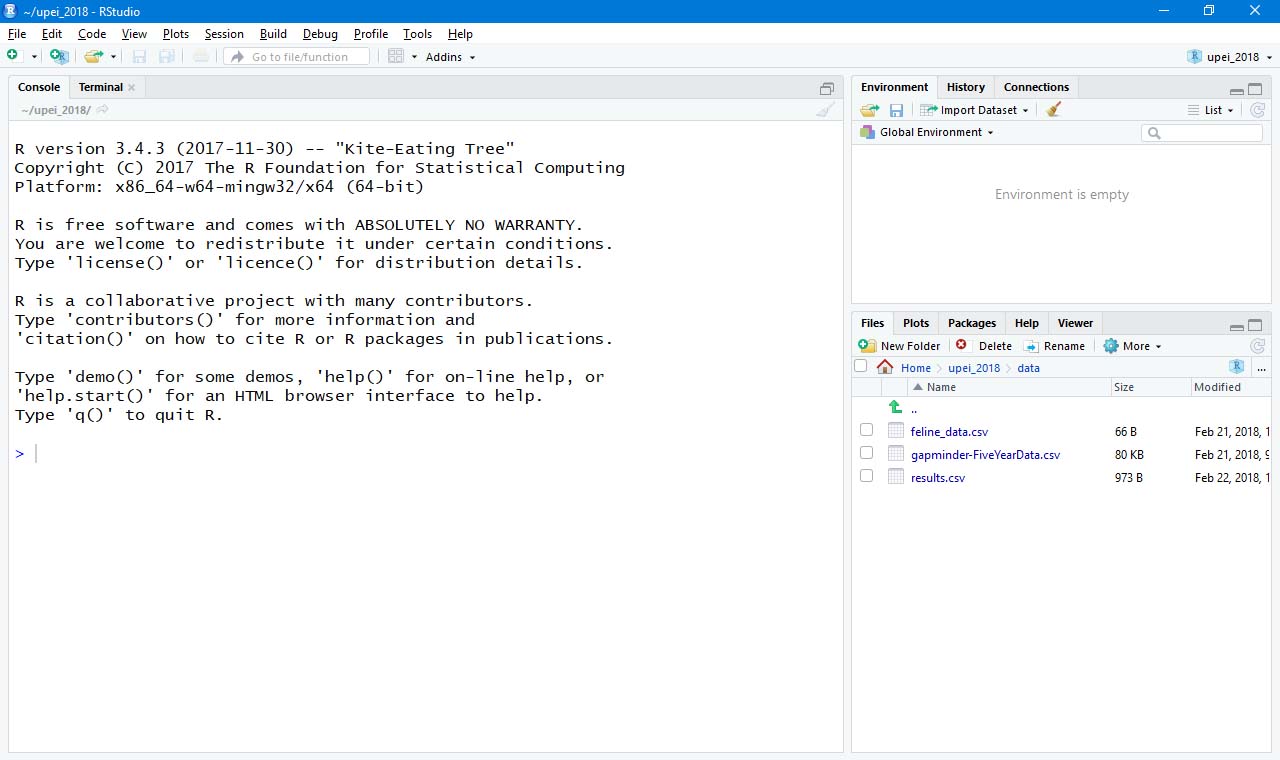
Figure 1. RStudio creates a new session, including a console interface to R, where you can start your work.
The main pane of the window, on the left-hand side, provides a console interface where you can interact directly with the R session that's running in the back end.
The right-hand side is divided into two sections, where each section has multiple tabs. The default tab in the top section is an environment pane. Here, you'll see all the objects that have been created and exist within the current R session.
The other two tabs give you the history of every command given and a list of any connections to external data sources.
The bottom pane has five tabs available. The default tab gives you a file listing of the current working directory. The second tab provides a plot window where any data plots you generate are displayed. The third tab provides a nicely ordered view into R's library system. It shows a list of all of the currently installed libraries, along with tools to manage updates and install new libraries. The fourth tab is the help viewer. R includes a very complete and robust help system modeled on Linux man pages. The last tab is a general "viewer" pane to view other types of objects.
One part of RStudio that's a great help to people managing multiple areas of research is the ability to use projects. Clicking the menu item File→New Project pops up a window where you can select how your new project will exist on the filesystem.
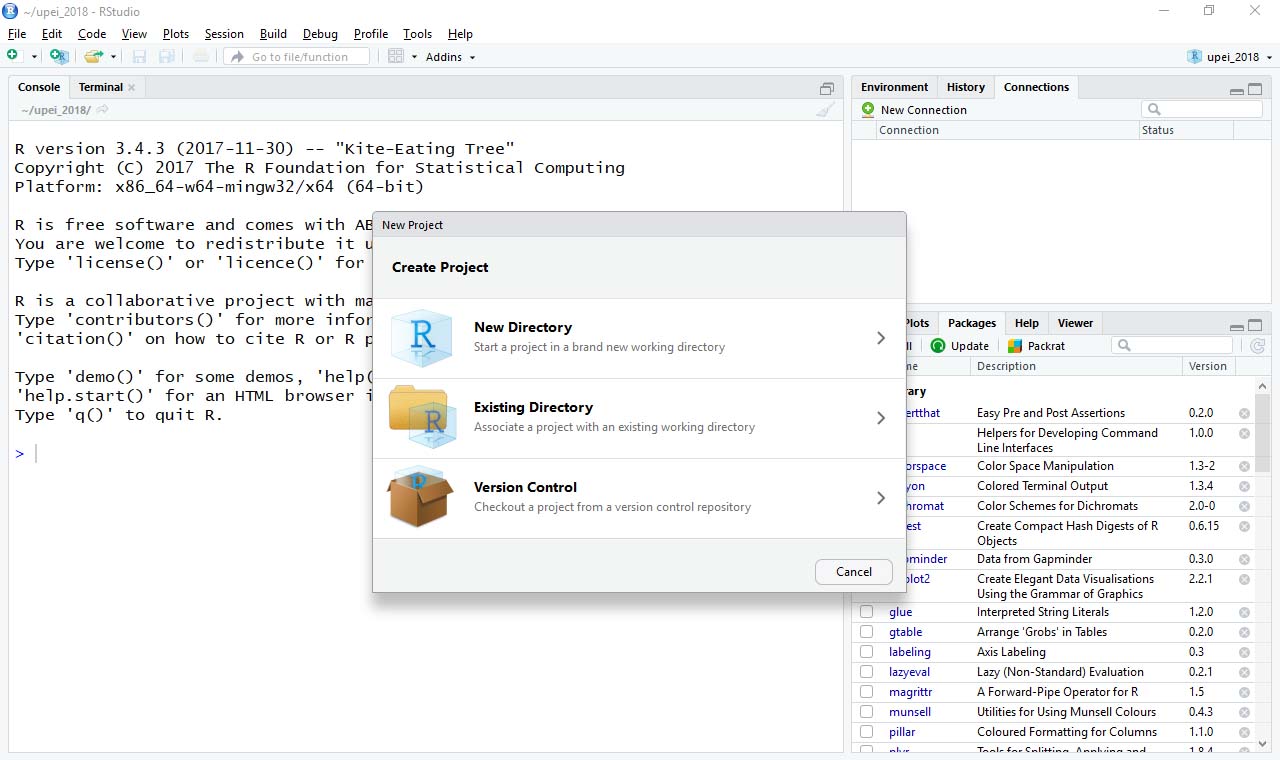
Figure 2. When you create a new project, it can be created in a new directory, an existing directory or be checked out from a code repository
As an example, let's create a new project hosted in a local directory. The file display in the bottom-right pane changes to the new directory, and you should see a new file named after the project name, with the filename ending .Rproj. This file contains the configuration for your new project. Although you can interact with the R session directly through the console, doing so doesn't really lead to easily reproduced workflows. A better solution, especially within a project, is to open a script editor and write your code within a script file. This way you automatically have a starting point when you move beyond the development phase of your research.
When you click File→New File→R Script, a new pane opens in the top left-hand side of the window.
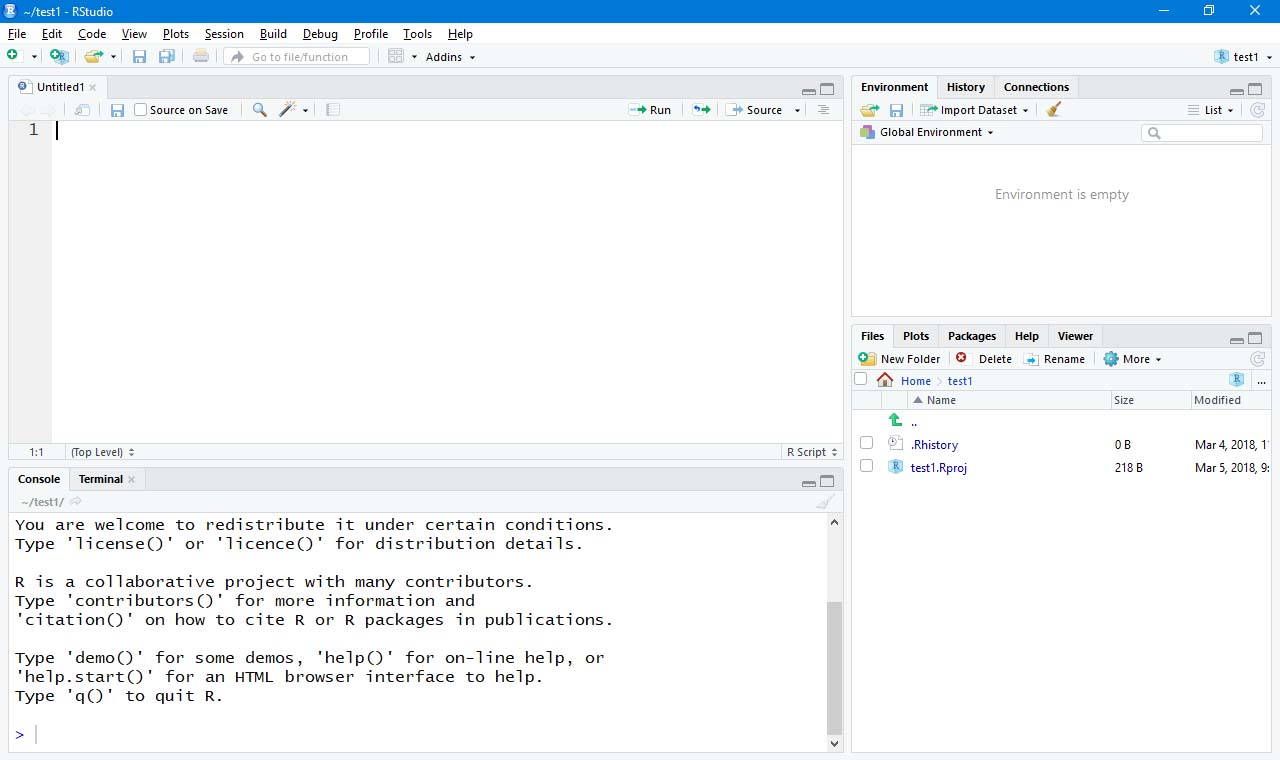
Figure 3. The script editor allows you to construct more complicated pieces of code than is possible using just the console interface.
From here, you can write your R code with all the standard tools you'd expect in a code editor. To execute this code, you have two options. The first is simply to click the run button in the top right of this editor pane. This will run either the single line where the cursor is located or an entire block of code that previously had been highlighted.
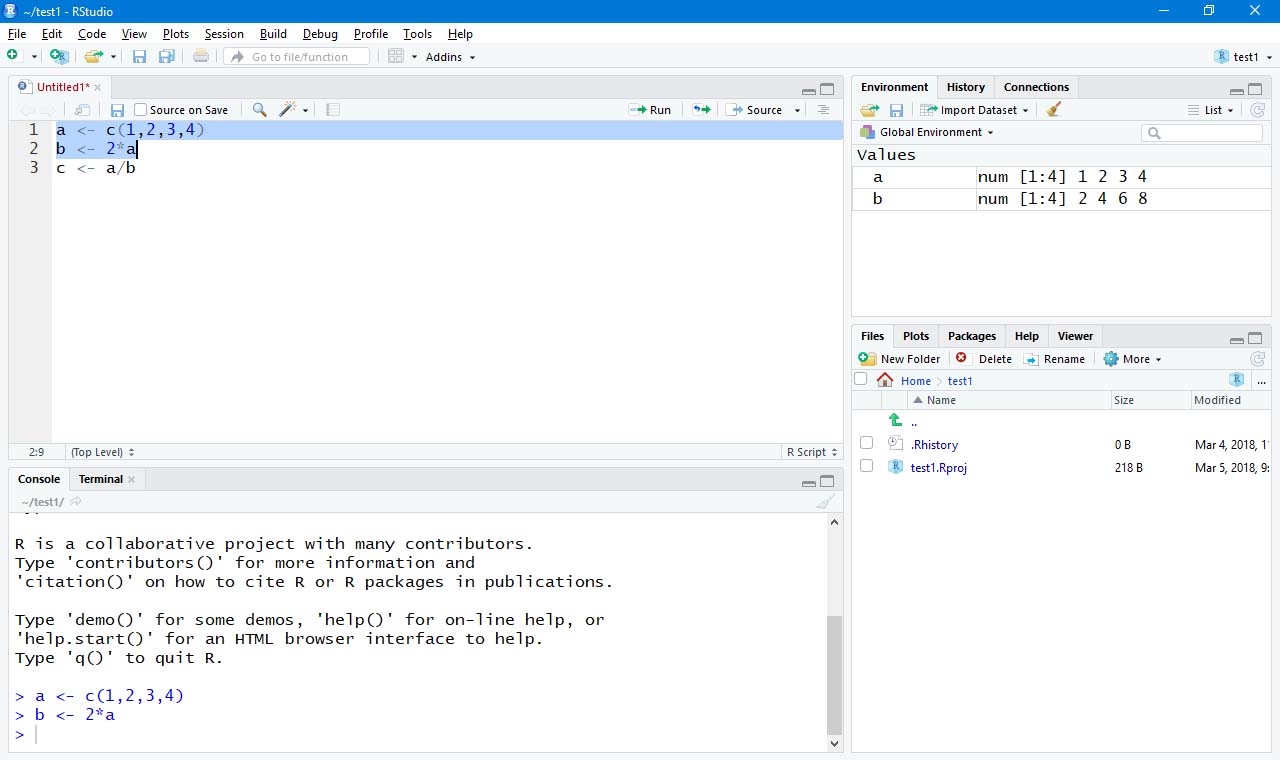
Figure 4. You can enter code in the script editor and then have them run to make code development and data analysis a bit easier on your brain.
If you have an entire script file that you want to run as a whole, you can click the source button in the top right of the editor pane. This lets you reproduce analysis that was done at an earlier time.
The last item to mention is data visualization in RStudio. Actually, the data visualization is handled by other libraries within R. There is a very complete, and complex, graphics ability within the core of R. For normal humans, several libraries are built on top of this. One of the most popular, and for good reason, is ggplot. If it isn't already installed on your system, you can get it with:
install.packages(c('ggplot2'))
Once it's installed, you can make a simple scatter plot with this:
library(ggplot2)
c <- data.frame(x=a, y=b)
ggplot(c, aes(x=x, y=y)) + geom_point()
As you can see, ggplot takes dataframes as the data to plot, and you control the display with aes() function calls and geom function calls. In this case, I used the geom_point() function to get a scatter plot of points. The plot then is generated in the bottom-left pane.
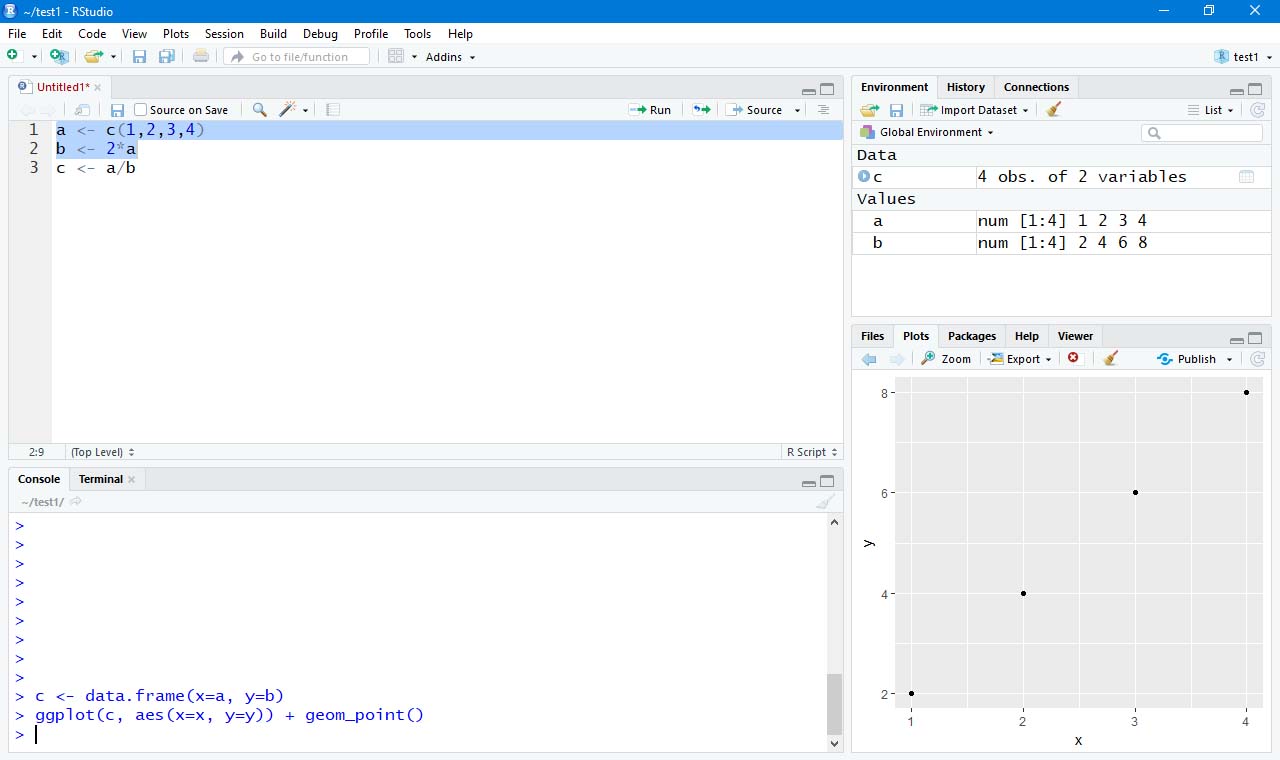
Figure 5. ggplot2 is one of the most powerful and popular graphing tools available in the R environment
There's a lot more functionality available in RStudio, including a server portion that can be run on a cluster, allowing you to develop code locally and then send it off to a server for the actual processing.
—Joey Bernard