
Use Clutter to develop OpenGL applications with rich 2-D and 3-D interfaces that include object rotation, scaling, texturing and more.
Meet one of the most revolutionary toolkits available for Linux: Clutter. Clutter is an OpenGL-based toolkit, described as an “open-source software library for creating fast, visually rich and animated graphical user interfaces”. Clutter provides a simple API for powerful three-dimensional and two-dimensional manipulation. Creating interactive games, 3-D media and animated applications for Linux systems with Clutter is cleaner, easier and quicker than coding an OpenGL application with more conventional methods.
Clutter comes with many built-in tools and effects. Rendering object rotation, scale, texture and opacity are built right in and can be accomplished with a few lines of code. Rendering and controlling the GStreamer multimedia API also is easy with an additional library. There even are Webkit bindings, so manipulating Web pages in a Clutter program is simple.
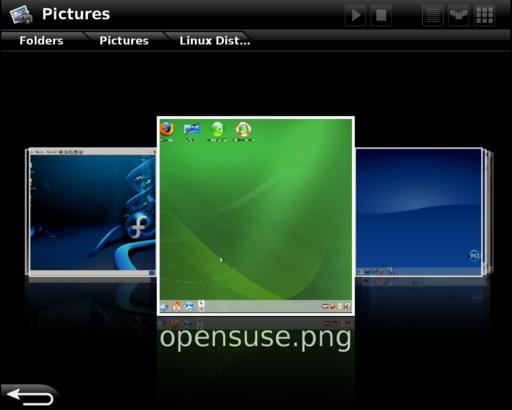
Clutter has been used in many successful applications and open-source projects. Take, for example, the open-source Elisa media center. Developed by Fluendo, Elisa is a 3-D media center—one of the most sophisticated alternatives to software such as Windows Media Center available for Linux. Elisa makes use of Clutter's animation and 3-D API in its elegant interface.
The Ubuntu Mobile Internet Device Edition, developed by the Ubuntu Mobile community, also uses Clutter for its main user interface. Additionally, the Moblin Project plans to use Clutter in its software platform. Clutter's use is widespread across Linux systems and is becoming more and more popular every day.

Figure 1. Elisa, Fluendo's media center application, utilizes Clutter's advanced library to add 3-D animation to its GUI.
Installing Clutter on Linux systems is extremely easy with the use of binary package managers. Install Clutter, the Cairo add-on, the GStreamer add-on and the Python bindings. Using your distribution's package manager, install the following packages: libClutter, libClutter-cairo, libClutter-gst and python-Clutter.
Different distributions will have different versions available, and it is recommended that you install the latest possible version. However, you need 0.8.0 or 0.8.2 of the libClutter packages to follow the examples and run the code given in this article. If the version number in your package manager is different from either 0.8.0 or 0.8.2, you should install Clutter from source. See Resources for the URL to Clutter's source files.
In this article, I'm using Clutter's Python bindings to work with Clutter. More can be done with Python in just a few lines of code, so using that language makes it easier to explore and understand Clutter. To test your install of Clutter, simply run Python and do the following:
import clutter
If you get a blank prompt back with no errors, the Clutter module was imported successfully, and you've installed python-Clutter correctly.
Now, let's start with a simple “Hello World!” Clutter application with Python. You probably should turn off any desktop effects or compositing window managers, such as Compiz Fusion. Most Linux video drivers will not allow multiple OpenGL or 3-D processes to run simultaneously with a compositing window manager, which includes Clutter, because of its 3-D capabilities.
To start the program, you need to import the Clutter module and define your main Class and an initialization function. Create a stage in the initialization function. The stage is the base of any Clutter interface. On the stage, objects called actors can be seen and manipulated. Clutter uses the term actors to describe any objects that exist on the stage.
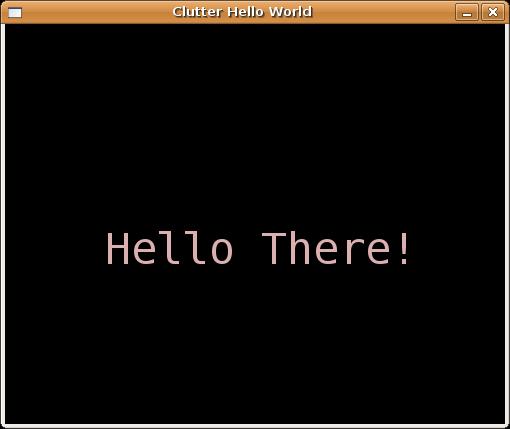
The sample program is shown in Listing 1, and the output window is shown in Figure 2.
After creating the stage, set the stage's properties and some properties of the window containing it.
Set color of the stage to black by accessing Clutter's predefined colors using Clutter.color_parse().
Next, set the size of the stage, which will set the size of the window. Also set the title of the window.
To show our “Hello world” message on the stage, you need to create an actor—in this case, a label. Set the font type of the label, the text to display, and the color of the label. Here, let's set the color manually rather than using a predefined color. Once the label is set, add the actor (the label) to the stage.
Labels work similarly to GTK+ widgets, but Clutter is not widget-based in the same way GTK+ is. Although both have similar functions and parts, Clutter contains only a handful of built-in “widgets”, which are called actors. Clutter's actors are limited to rectangles, labels, images, video textures and a few other items.
To finish the example, tell the stage to show all of its contents and call the main Clutter loop, which will display the interface. The last step is to tell Python to create an instance of your class.

Figure 2. The simple “Hello World” Clutter Program Running on Ubuntu
Now, let's take a look at a more useful Clutter program. Our program will use the Clutter GStreamer library to display and control a video file on the stage. Connect GStreamer's video output to a video texture, which is then displayed on the stage and can be manipulated as an actor.
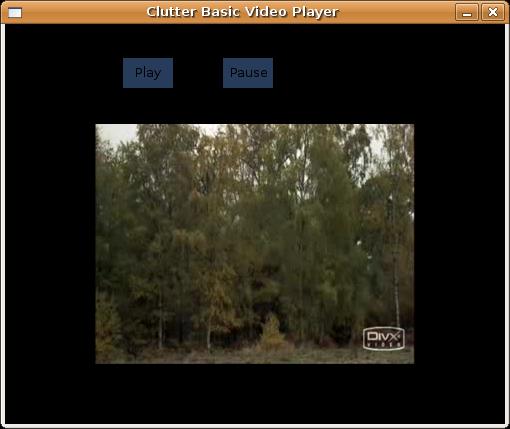
There are three main actors on the stage: the play button, the pause button and the GStreamer video. When the pause button is pressed, the video pauses, and it will continue playing when the play button is pressed. The program is shown in Listing 2, and the window is shown in Figure 3.
After the initial setup, define a signal for responding to mouse clicks. Clutter uses signals to respond to events in the same way GTK+ does. The signal dictates that when any button on the mouse is clicked, the specified function is called.
Next, create the buttons by creating rectangle actors for the button shape and text actors for the button text. Remember that Clutter is not widget-based, and there are no default button widgets as part of the API.
To create the video, you need a video texture. A video texture is a physical plane on which GStreamer can display the video. The video texture can be manipulated on the stage like an ordinary actor.
You also need two other GStreamer elements to play the video: a playbin and a pipeline. Clutter-Gstreamer will play any file type that GStreamer can play. After creating the playbin, set the location of the video to play and add the playbin to the pipeline.
Then, set the position of the video texture, add it to the stage and tell GStreamer to start playing the video.
Finally, create the mouseClick function. This function is called when the mouse is clicked anywhere on the stage. Check to see if the left mouse button was clicked inside one of the buttons and if it was, change the size and color of the buttons to give visual feedback of the click. Tell GStreamer to start or stop the video depending on which button was pressed.

Figure 3. Clutter Video Player Playing the Monty Python Skit “How Not to Be Seen”
An important feature of Clutter is its animation API. Animating any actors on the stage is easy with Clutter. Using the animation API, you can add smooth animations and effects to your Clutter application.
In the next example, let's take the GStreamer video texture and manipulate it in three dimensions. The GStreamer texture is rotating on the y-axis constantly.
The program is shown in Listing 3, and the window is shown in Figure 4.
After the initial setup, create a timeline. Timelines are used in Clutter to control animation and time events. The example timeline lasts for 100 frames at ten frames per second, and the timeline is set to loop forever.
Next create an alpha (see The Alpha Functions sidebar) for the animation, assign it to your timeline and give it a smooth step decreasing function. In simplest terms, the alpha is used to control the speed of the animation. The smooth step function causes the animation to speed up, then slow down, come to a halt, and then start up again. Clutter has several functions built in that you can use with the alpha, including sine, exponential and ramp functions.
Next, define the Rotation behavior the animation uses. Clutter uses behavior effects to describe animations. The Opacity behavior, for example, can change the visual alpha of an actor, making it transparent or opaque. Other behaviors include Scale, Path, Depth, B-Spline and Ellipse.
In this example, we tell our Rotation behavior to rotate over the x-axis, rotate clockwise, start rotating at an angle of zero, end at 360, and finally, tell it to use the alpha created earlier, respectively. After that, the rotational center, or the point the actor rotates around, is set to the approximate center of the GStreamer texture and the Rotation behaviour is applied to the video texture.
In addition to the normal startup steps, the timeline must be started.
Hopefully, you've learned a good deal about how Clutter works, and you can start developing and programming using the Clutter API. Using just the features you've seen here, you'll be able to create any interface that uses text, buttons, images and video with Clutter. Of course, after learning the basics, the more advanced UI elements will become easier to understand and work with.
In the future, the Clutter developers will continue to improve and update the API, and many new improvements are expected in the Clutter 1.0 release. You can learn more about the Clutter development process from the Web site (see Resources). Clutter is going to power many innovative open-source applications in the future.