
Jason scratches the surface of OpenGL programming techniques using PyOpen GL, a suite of Python modules.
Graphics programming can be tedious. Linking against large 3-D libraties increases compilation time. Because a lot of fine tuning is often necessary for everything to look perfect, stretches of minor changes buried between long builds are commonly encountered. These lengthy debug cycles make 3-D graphics an ideal application for prototyping in a high-level language like Python.
Extensions to a number of 3-D graphics APIs are available for Python. For IRIX systems, the Python distribution comes with a module providing access to the SGI IRIS GL library. Python programs can make use of the Java3D API from inside JPython, an implementation of Python that runs inside a Java Virtual Machine. This article focuses on the OpenGL library because of its widespread use and excellent support for Linux and Python.
PyOpenGL is a suite of Python modules that provides access to OpenGL as well as an assortment of helper utilities and extensions to complement OpenGL's low-level interface. It was originally created by James Hugunin, Thomas Schwaller and David Ascher. Tarn Burton recently has taken over as lead developer, and Rene Liebscher and Michael Fletcher also maintain the package.
Since OpenGL wrappers make up the bulk of PyOpenGL's functionality, you will need a basic understanding of OpenGL to write programs with it. There are many excellent tutorials and references available on OpenGL, see Resources for a list of recommendations.
The first requirement for PyOpenGL is OpenGL itself. If you don't have an OpenGL implementation installed already, check your GNU/Linux distribution to see if it includes the packages, or download the Mesa 3-D graphics library from www.mesa.org. For PyOpenGL to work at full capacity, the module Numerical Python must be installed. Sources for Numeric and PyOpenGL can be found at numpy.sourceforge.net and pyopengl.sourceforge.net, respectively. Compilation and installation is easy thanks to Greg Ward's distutils module, which is included in Python as of version 1.6. Running the command python setup.py install from inside the unpacked source directories should build and install the modules. Before installing from source, you may want to check if your GNU/Linux distribution already provides these modules. They were included as part of my Debian distribution. Note: the version I worked with is PyOpenGL 1.5.7, since the time of this writing, version 2.0 has become available.
The OpenGL specification does not define specifications for interaction with windowing systems. Consequently, programs using OpenGL must use an external GUI toolkit. The program in Listing 1 uses GLUT, a cross-platform windowing toolkit for OpenGL. Unless you are using a commercial OpenGL implementation, you probably already have GLUT installed.
Listing 1. Opening a Window, Setting up Lighting and Drawing a Teapot with GLUT
This code opens a window, sets up lighting and draws a teapot. Aside from the added syntactic compactness Python affords, it looks much like the equivalent program written in C. One minor difference is how the display function callback is set. Setting the display function callback in C or C++ would only require calling the function glutDisplayFunc(display). Setting the callback in PyOpenGL is done in two steps: invoking glutSetDisplayFunc() and then glutDisplayFunc(). This idiosyncrasy also applies for setting other callbacks such as glutMouseFunc() and glutReshapeFunc().
While GLUT is suitable for most small OpenGL applications, it still requires a fair amount of work to implement functionality that is often desirable when testing, such as mouse control for zooming, panning and rotation. Togl is a Tkinter widget that automatically provides these features as well as default lighting. Listing 2 shows the same program using Togl.
Listing 2. Same Program Using Togl
Notice it uses considerably less code but provides much more functionality. The cost of this is flexibility. If Togl's default lighting and user interface don't meet your requirements, you will need to re-implement them yourself. Togl is excellent for prototyping, as it eliminates the need to write and debug boilerplate lighting and navigation code.
PyOpenGL also integrates well with other GUI toolkits that have 3-D widgets. Bindings exist for wxWindows, FLTK, FOX and GTK.
Texturing mapping is the technique of taking image data, like a photograph, and “gluing” it to a polygon. Using textures requires converting the external texture images into one of the low-level internal formats supported by OpenGL. While the code required for setting textures in Python does not differ much from normal OpenGL code, Python does simplify the process of loading and manipulating texture image files.
The Python standard library includes rgbimg, a module for reading SGI imglib(.rgb) files. While this may seem like an obscure format, its simplicity allows its inclusion in Python's standard library without causing too much bloat. Using the GIMP or ImageMagick, you can convert images from formats like PNG, JPEG or TIFF to SGI imglib. The command rgbimg.longimagedata(file) will read and decode the specified SGI imglib formatted file and return it as a binary string of four-byte RGBA pixels. This data can be passed to OpenGL functions like glTexImage2D, using the format parameter GL_RGBA and the data type GL_UNSIGNED_BYTE.
Another useful module in the Python standard library is imageop. This module includes functions for cropping, scaling and grayscale conversions for images. The imageop functions operate on data in the same GL_RGBA/GL_UNSIGNED_BYTE format as the data returned from rgbimg.longimagedata().
In addition to wrapping the core libraries and toolkits, PyOpenGL also includes a number of utility functions to perform high-level tasks. Have you ever wanted to grab a still image of an OpenGL scene? You always can use programs that support screen capture, such as xv or The GIMP, but what if you want to grab a still at a specific point in time? Taking screenshots manually won't work if the program needs to run without user control, like a CGI script. You also can't grab a dozen stills a second manually to create a movie. PyOpenGL has a couple helper functions for automatically grabbing scene shots in various formats.
Listing 3 is an adaptation of the previous program that saves a PostScript image of the scene to disk, then exits. You can take a look at the image that was saved in Figure 1.
Listing 3. Saving a PostScript Image, Then Exiting

Figure 1. Results from Listing 3
The scene is saved using the command
openglutil.glSaveEPS('ex3.eps', 240, 240)
The first argument is the name of the file to save to. The second is the width in pixels to capture, and the third is the height. Using the same syntax with the glSavePPM() command will save an image of the scene in the portable pixmap file format. Additionally, if you have compiled PyOpenGL with TIFF support, the command glSaveTIFF() is available for saving scene shots in the TIFF format.
PyOpenGL also provides a convenience wrapper for OpenGL's object selection or “picking” mechanism. The selection mode of operation in OpenGL automatically tells you which objects fall within a given region of the view screen. This means you can pass the selection mechanism to a point on the screen where a mouse click occurred, and it will tell you what object was clicked on.
Here are the basic steps for setting up the selection mechanism in PyOpenGL:
Write a method or function that draws each object in the scene wrapped in between a call to glPushName() and glPopName(). Pass a different integer as an argument to glPushName() for each independent object in the scene. OpenGL will use this value to indicate which objects were selected.
Set up the event handler for mouse clicks. The way this works depends on the toolkit you are using. In Tkinter, mouse-click event handlers are set up by passing a method or function reference to the bind() method.
Once a mouse click has occurred, pass the mouse x and y coordinates, along with a reference to the method or function created in part one, to the function OpenGL.GL.glSelectWithCallback(). This function will return a list of tuples of the form (near, far, names) where near and far represent integer depth values, and names is a tuple of the names passed in glPushName() for the selected objects. If no objects were selected, an empty tuple is returned.
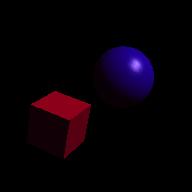
Listing 4 demonstrates use of the selection mechanism in PyOpenGL. This demo draws a cube and a sphere on the screen. Experiment with holding down the Ctrl key and pressing the left mouse button with the pointer in different places.
Listing 4. The Selection Mechanism in PyOpenGL

Figure 2. Results from Listing 4

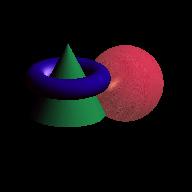
The fog.py Demo Included with PyOpenGL

A Simple Scene with Lighting and Textures Rendered Using PyOpenGL

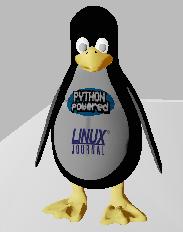
A 3DStudio Model Rendered Using PyOpenGL
The selection mechanism is the simplest way to perform this task, but it is by no means the only way. Another technique is to render the objects to a back buffer that OpenGL does not send to an output device. To do this, render each object using a different color. Once done, the back buffer should contain the 2-D rendering of the scene. By examining the color at a particular point you can determine which object was drawn in that region of the screen. This back buffer is called the feedback buffer in OpenGL.
Yet another method for object picking is to do the intersection testing by hand. This means you would have to project a ray from the view screen and test each object in the scene for intersection. Once you have found a list of intersected objects, you then must sort by depth values to see which was closest to the view screen. While this may offer more control over the process, it is an arduous task and is difficult to do efficiently in Python.
Now that you have seen how to write simple OpenGL programs, you are probably wondering if Python can scale up to the demands of more advanced 3-D applications. While the performance of a PyOpenGL program generally lags behind that of its C or C++ counterpart, optimization techniques can narrow the gap considerably.
The main strategy in improving execution speed is to reduce the amount of time spent within the Python interpreter by moving expensive operations into native code. One means of accomplishing this is to rewrite sluggish parts of the program in a fast, natively compiled language like C or C++. Implementing these compiled portions of the program as Python extension modules allows the remaining interpreted Python code to access their functionality. While this approach certainly has potential for speeding things up, it lacks the simplicity of a pure Python solution. It also requires you understand how to write Python extension modules in a language that compiles to native code. Besides, if you wanted to do it in C, you wouldn't have started messing around with Python in the first place!
OpenGL display lists provide a way to move operations into native code without any of the headaches associated with the former approach of writing extension modules. Display lists allow OpenGL programs to cache a set of commands further down in the rendering pipeline. In some environments, OpenGL even can store display lists on the graphics card itself, far away from the bottleneck of the Python interpreter.
The glGenLists() command creates an array of empty display lists. It takes a single integer argument, the number of display lists, to generate. It returns the number of lists that were successfully created. Wrapping a set of OpenGL operations with the commands glNewList() and glEndList() fills a specified display list. Once stored, subsequent invocations of that set of operations requires only a single command, glCallList(). The syntax for using display lists in PyOpenGL is pretty much the same as in OpenGL with C.
We have just begun to scratch the surface of OpenGL programming techniques in Python. For more information, make sure to check out the documentation that comes with PyOpenGL or on-line at pyopengl.sourceforge.net/documentation/index.html.