
Tips from the Graphics Muse: web page fundamentals.
My first bit of musings is about the use of images in web pages. I get a lot of e-mail from people who've seen my web pages (or possibly my ramblings on various newsgroups or mailing lists) asking how to do blah or where can I get blah to do blah for their web pages. The “where” parts are in my HOWTO pages that can be found at: http://www.csn.net/~mjhammel/linux-graphics-howto.html and http://www.csn.net/~mjhammel/povray/povray.html.
The “how” part is a broad question. I'll summarize. When creating graphics for your pages, keep the following things in mind:
Consider your target audience—home users:
Most home users have slow links. Even 28.8 modems don't load big graphics all that fast. Keep your images small.
Animation done in the same manner as cell-animation for cartoons (sequences of individual images with slight variations to simulate movement) requires that each cell be loaded across the Net. This is tantamount to one big image taking forever to load.
Most home users are still limited to 256 colors on their displays. Lots of users have upgraded to better graphics cards, but how many people do you want to alienate with an image requiring 10,000 colors?
If you want the average person to visit your page, you have to provide two things: content and flash. The flash has to be done using as little download time as possible, with as much color as you can squeeze in without overloading the browser (causing it to dither images). The content, not the flash, must be the reason for your pages.
Background images should be just that—in the background. Don't make the background so gaudy that it distracts from your content.
Use common color maps—this reduces the number of colors the browser has to allocate, leaving some space for other applications. X-based systems can allocate colors into private color maps, but this causes that annoying “flashing” you see (try running Netscape with the install command line option, and you'll see what I mean).
Flash can be added easily with a simple background over which you add some in-line transparent GIFs.
Never use an “Under Construction” image. It's the Web. Of course it's under construction.
Don't put those silly graphic dots in place of HTML list bullets. First, they waste the user's time downloading (each requires another connection to the server), and second, they break the formatting rules provided with HTML. It's just not a good practice, and they don't add any real value to your pages.
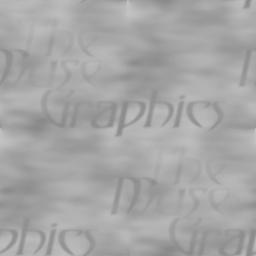
Now that you know some basic guidelines for your images, how do you go about creating the images? It depends on what kind of images you want to make. If you want a simple, cartoon-like image you can get a drawing program like xpaint. This tool is good for drawing circles and boxes and filling them in, using a window like a canvas to paint on the screen. However, it is limited in what you can do to the image once you've drawn it. One highly popular tool for a number of platforms that provides post-processing capabilities is Adobe Photoshop. Using a tool like Adobe takes a bit of practice, but once you've mastered it, you can do some rather amazing things. A Linux alternative to Photoshop is The GIMP, which can be found at http://www.XCF.Berkeley.EDU/~gimp/. The logo on the Graphics Muse page in LG (Figure 1) was created with The GIMP; so was the background (Figure 2).

Figure 1. Graphics Muse Logo

Figure 2. Background, Graphics Muse Page
Three dimensional images are another matter. There are actually more well-known tools for doing 3D work than there are for doing image manipulation (which is handled by tools like The GIMP). Probably the best known of these is POV-Ray. This tool reads in a text file that uses a “scene description language” to describe how objects in the scene should be positioned and textured. The drawback to these tools is that they lack a point-and-click interface. There are separate tools, known as modelers, available that allow the creation of the scene files without actually rendering the image. In order to create a 3D image you need to either learn the scene description language or learn how to use a modeler that will create it for you.
Next month: How do you create the textures you apply to 3D images? Beyond that, I'm considering writing about how to use Type 1 fonts in your images: how to install them, how you can manipulate them with The GIMP to make interesting logos, etc. I'd also like to provide some tips for using POV-Ray and BMRT (although I have a lot to learn about the latter). And I might also cover how to do animation. Things are pretty open right now. Let me know what you'd like to hear about! (mjhammel@csn.net)